How to Change Visual Property in Selected Map Layer
This new feature has a specific meaning. Its benefit is important if you have created several
visual categories within one layer and you need to change one specific property for all categories
– for example, the transparencies of polygons fill colors. In the previous version, you have to set
this property individually for each category.

In the current version, you can define selected property at once for all categories. For this
purpose, you will use a dialog that will appear when you click on the item Special – Change
Visual Properties.

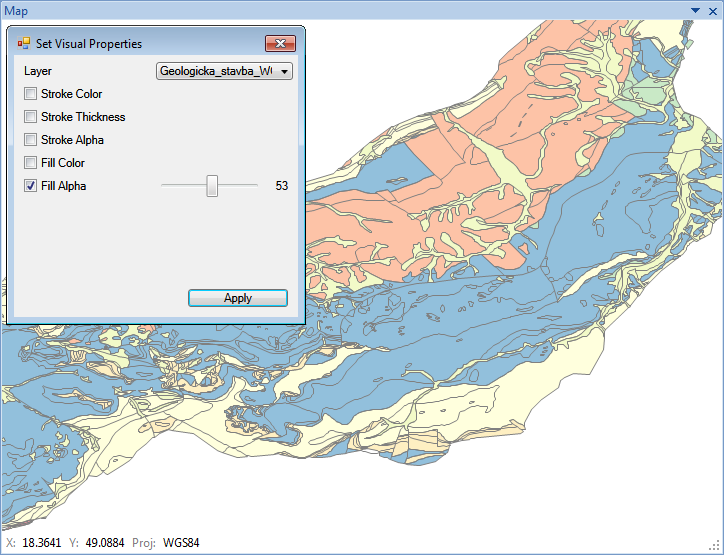
In this dialog, you select (in Layer combo-box) the map layer whose categories you want to edit.
Depending on the layer type (polygon, line, point), editable properties will appear.

To edit the selected property, set the check-box to TRUE and define the property using the
displayed control. After setting it, just click on the Apply button and all changes will be
applied to the selected map layer. In the following figure, we changed the transparency of
the polygons fill.
In the example of the last figure, we changed the border line thickness and color.

This feature is best suited (for example) to modifying map layer transparency before the
export to KML files, or to share map with function Publish / Share Map.