How to Export ShapeFile Data
« Go Back
Next Chapter »
This Export Map Data function exports your data from the
selected map layer onto an Excel spreadsheet. My following
extended example of how this funtion works begins with the
illustation of digitalized water areas in Slovakia shown below.
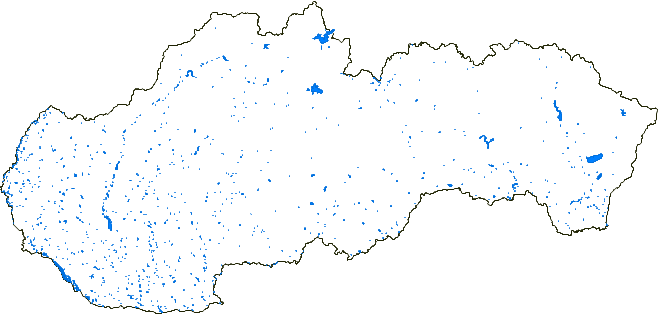
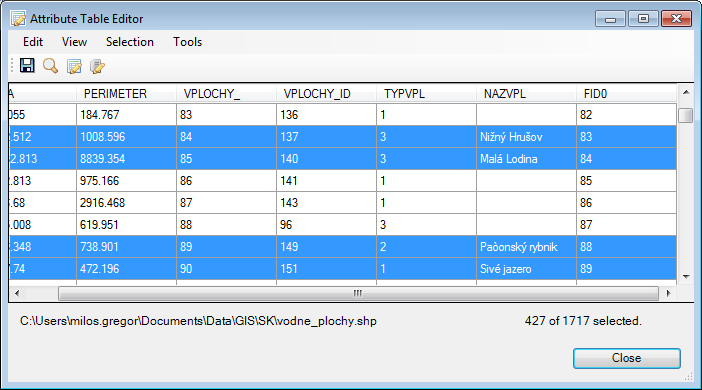
Here, I have a layer with 1,717 digitized surfaces. When I
click-up the layer attribute table, I see that it contains
multiple values. [One is the lake/water area name--under
NAZVPL].

Now I want to export all named lakes from the described
map layer, so I select them by clicking on the Selection
– Query item in the menu. This displays the Expression
Editor dialog where I can select the named lakes using the
SQL dialog command [NAZVPL]
gives me the lake names.
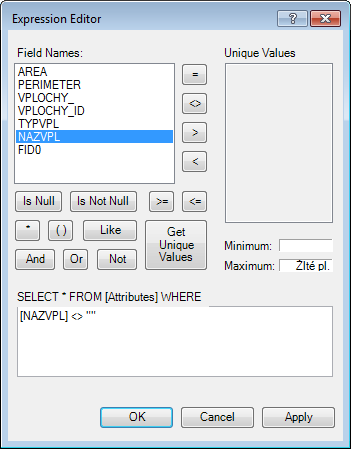
I click the OK button, and all features with a name are
selected. Then I close the attribute table window.
When I want to export only selected features, I create a
new map layer using the Selection – Create Layer from
Selected Features command in the Legend panel context menu.
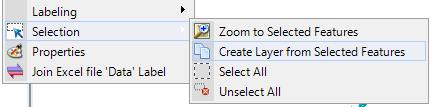
The new layer is created in both the Map and Legend
panels, and it now contains only the named lakes. If
I want to export these features to Excel, I click on
the GIS to Excel – Export Map Data ribbon toolbar item
to display the dialog in the following figure.
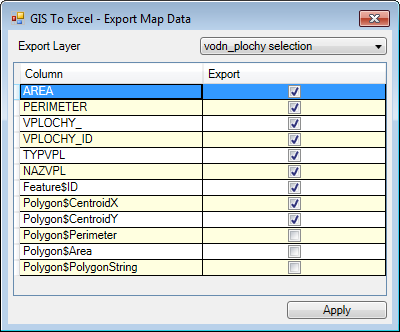
Now, you can choose the Layer you want to export in the
Export Layer top combo-box. After selecting the Map Layer,
it automatically fills the bottom table. This table
contains the values you can export to the Excel table.
The first data in the table shows the layer attribute
table columns, and then you have the derived values that
can be exported.
The Feature$ID indicates the first derived parameter
for the vector Map Layer This feature identifier is
in the format of an integer number, and it is unique
for each feature in the Map Layer. For example, it
can be used for connection, if you want to quickly
import edited values back from the Excel table to
your Map Layer attribute table. You can also link this
value in the connection method named RowID.
The following exportable values vary depending on whether you choose to export layers of points, lines or polygons. If you choose points, you can export only the X and Y coordinates of each point, but for lines, you can also export the value of the selected line; and if you choose polygon layers, you can export the coordinates of the centroid feature, the polygon perimeter and also the area values.
Checking the box in the second column of the table defines
the given values you want to add to the export. When you
click Apply, your selected values are exported to the
clipboard; and the next message box tells you this process
is completed.
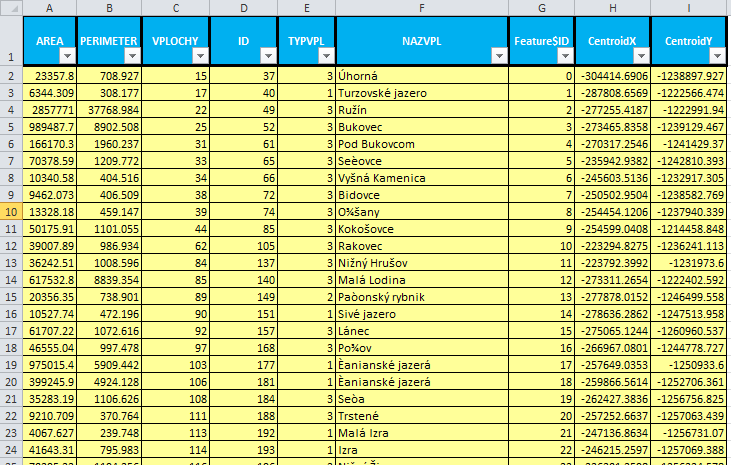
You can now insert your exported values in a spreadsheet
by pressing Ctrl+V. After this, you can work with your
values using conventional Excel features, including sorting,
filtering, dynamic formulas and cell coloring.
If you want, you can also import your values back to the
Map Layer after editting, using the Excel to GIS –
Update Layer command